美国TABER泰伯996 光学千分尺996A 光学观微仪996A1
光学测微仪 表面测量
手持便携式仪器测量
一定范围的表面损伤。
光学千分尺将测量并评估宽度或划痕,裂缝,凹陷,腐蚀,凹痕和其他深度
各种材料都有瑕疵。另外,可以使用量化马刺和其他小突起的高度。
对于透明材料,此仪器可用于测量厚度,开裂深度,断裂深度和宽度嵌入的空隙。
简单的设计可提供准确的结果。
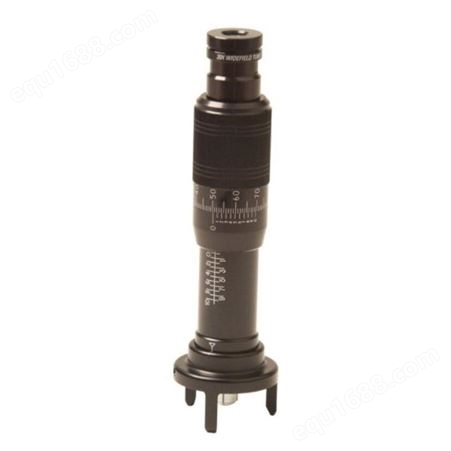
易读的游标尺是所有光学深度的标准配置千分之一,千分之一,千分之一
和十分之一。为了读取数据,操作员旋转千分尺套管直到该区域的主表面到来
成为焦点。随后的读数在不同的焦点深度以相同的方式制作。根据型号,光学
千分尺JIN确到±英寸。
适应凸,凹和复合轮廓。
仪器坚固耐用,非常适合野外使用应用程序。使用可互换的底座之一,几乎可以测
量任何表面-挡风玻璃,机身,机身蒙皮,螺旋桨叶片,转子叶片,涡轮叶片,还有更多。
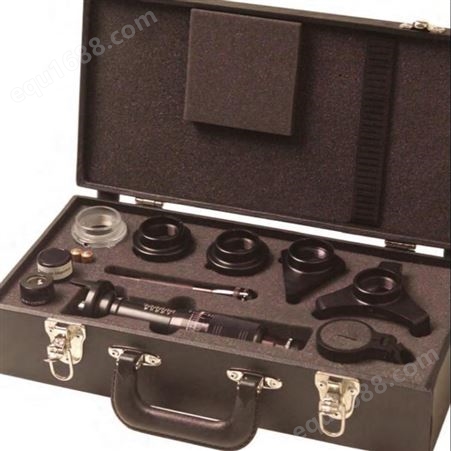
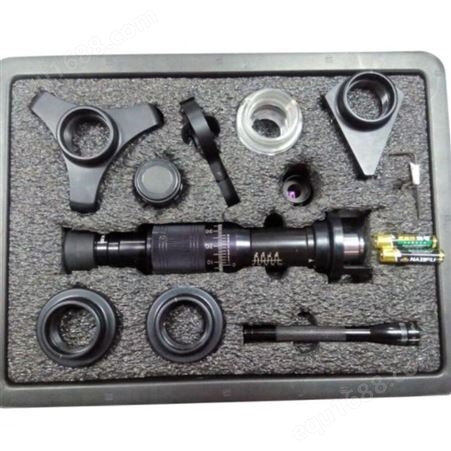
显示:光学测微仪套件(966A1型)–包括5倍和10倍可互换光学元件,20倍
目镜单元,标线片目镜单元;另外五个底座,千分尺灯,可调光支架和外壳。
光学测微仪 表面测量仪
有两种型号:
966型(100功率)
建议用于需要更大工作深度的应用。使用该仪器可以读取深度为英寸的读数。
可以测量厚度高达英寸的透明材料±英寸精度。
型号966A(200电源)
用于初级平面和简单弯曲的标准仪器表面。深度(在表面下方)读数可以达到英寸
精度在±英寸以内。也会测量透明材料厚度可达英寸。
型号966A1
包含以上两种型号的设备。
配件:
三脚架底座(970型)–适用于平坦,简单和复合弯曲的表面(仪器随附)
Quadpod Base(971型)–启用测量在凸形和/或凹形不规则曲面上
偏置三脚架底座(972型)–允许读数与突出障碍物相邻的平坦或弯曲表面
楔形两脚架底座(973型)–在平面交点处使用表面形成至少80°的角度
半透明V型块底座(974型)–获得读数从圆形表面或外角,也从平面邻近凹陷区
大型三脚架底座(975型)–用于需要比三脚架底座更大的支撑区域,非常适合小零件检查
十字线目镜单元(966AR型)–插入十字线目镜单元,千分尺成为光学比较器能够进行高达
英寸的jin确宽度测量
精度为英寸(与966A型配合使用)10x可互换光纤(966AC型)–转换模型966至966A型
5x可互换光学元件(966C型)–转换模型966A至966型
美国TABER泰伯划痕测试仪 光学观微仪996系列技术指标
966型 966A型
放大倍率 100x 200x
光学工作距离 0" 0"
(深度测量)
千分尺工作距离 " "
材料厚度(透明) " 0"
精度 ±" ±"
图像区域直径为 英寸 直径英寸
图像焦平面 ±" ±"
Optical Micrometer
Surface Measurement
Handheld, portable instrument measures
a range of surface damage.
The optical micrometer will measure and evaluate the width
or depth of scratches, cracks, pits, corrosion, dents and other
blemishes in a variety of materials. In addition, it can be used
to quantify the height of spurs and other small protrusions.
For transparent materials, this instrument is useful for measuring
thickness, depth of crazing, depth of fractures, and width of
embedded voids.
Simple design provides accurate results.
An easy-to read Vernier Scale is standard on all optical depth
micrometers and is calibrated in thousandths, ten thousandths
and hundred thousandths. To take a reading, the operator rotates
the micrometer thimble until the primary surface of the area comes
into sharp focus. Subsequent readings at varying depths of focus
are made in the same fashion. Depending on model, the optical
micrometer is accurate to ±".
Adapts to convex, concave and compound contours.
With a rugged housing, this instrument is ideal for field
applications. Using one of the interchangeable bases,
practically any surface could be measured - windshields,
airframes, fuselage skin, propeller blades, rotor blades,
turbine blades, plus many more.
*Shown: Optical Micrometer Kit (Model 966A1) –
Includes 5x and 10x interchangeable optics, 20x
eyepiece cell, reticle eyepiece cell; five additional
bases, micrometer light, adjustable light
bracket and case.
Optical Micrometer
Surface Measuremen
Available in Two Models:
Model 966 (100 power)
Recommended for applications requiring greater working depth.
Depth readings to " can be made with this instrument.
Transparent materials up to " thick can be measured with
±" accuracy.
Model 966A (200 power)
The standard instrument used for primary flat and simple curved
surfaces. Depth (below the surface) readings to " can be
made within ±" accuracy. Will also measure transparent
material thicknesses up to ".
Model 966A1
Contains equipment for both models above.
Accessories:
Tripod Base (model 970) – Intended for flat, simple and compound
curved surfaces (supplied with instrument)
Quadpod Base (model 971) – Enables measurements
on convex and/or concave irregular curved surfaces
Offset Tripod Base (model 972) – Permits readings
of flat or curved surfaces adjacent to protruding obstructions
Wedge Bipod Base (model 973) – Used when intersection of planed
surfaces form angles of at least 80°
Translucent V-Block Base (model 974) – Obtains readings
from round surfaces or external angles, also flat surfaces
adjacent to recessed areas
Large Tripod Base (model 975) – Used for applications requiring
a larger support area than the tripod base, ideal for small parts
inspection
Reticle Eyepiece Cell (model 966AR) – By inserting the reticle
eyepiece cell, the micrometer becomes an optical comparator
capable of making accurate width measurements up to "
to an accuracy of " (for use with Model 966A)
10x Interchangeable Optic (model 966AC) – converts model
966 to model 966A
5x Interchangeable Optic (model 966C) – converts model
966A to model 966
Specifications
Model 966 Model 966A
Magnification 100x 200x
Optics Working Distance 0" 0"
(depth measurement)
Micrometer Working Distance " "
Material Thickness (transparent) " 0"
Accuracy ±" ±"
Image Area " dia. " dia.
Image Focal Plane ±" ±"


所有评论仅代表网友意见,与本站立场无关。